Getting Started with JUnit 5: Writing Your First Test

In this article, we will learn how to write and run a simple JUnit 5 test. We will learn how to setup preconditions, interact with the object we want to test, and verify that it behaves like we expect.
This article is part of the JUnit 5 Tutorial.
Setup
The accompanying source code example already has configurations for both Maven and Gradle but there are also step by step guides for our convenience:
Writing Our First Test
When we are testing some piece of software we want to make sure it does what it is expected to do. When writing automated tests:
- First, we set up preconditions for code we want to test
- Next, we interact with the code to test
- Finally, we check the results are what we expected them to be
This is called the Arrange, Act, Assert pattern.
Let’s take a look at some piece of software that we would like to test:
public class Calculator {
    public int add(int first, int second) {
        return first + second;
    }
}
We have a very simple calculator class. All it does is add two numbers together. When testing this code, we would like to make sure the calculation is correct.
We can follow the Arrange, Act, Assert pattern by:
- First constructing an instance of the
Calculatorclass - Then calling the
add()method with some parameters and store the result - Finally, checking the results by calling the
assertEquals()method that compares the expected and actual value
import org.junit.jupiter.api.Assertions;
import org.junit.jupiter.api.Test;

class CalculatorTest {
    @Test
    void addNumbers() {
        // Arrange
        Calculator calculator = new Calculator(); <strong>x</strong>

        // Act
        int sum = calculator.add(1, 2);

        // Asset
        Assertions.assertEquals(3, sum);
    }
}
The test class can be called anything but here we have put the test code in a CalculatorTest class. We will name the test method simply addNumbers() so that it describes what we are trying to do.
To be able to run the test, we also have to annotate the method with the @Test annotation. This way the test runner recognizes the method as a test method.
Running Our Test
To run the tests we have several options. When using an IDE we can run the tests directly from the IDE. We can also run the test from the command line using a build tool like Maven or Gradle.
When the software performs as expected, the test will pass. When it does something unexpected, the test will fail.
Running from IntelliJ IDEA
When using an IDE like IntelliJ IDEA we can just right click the test class and select Run CalculatorTest. Alternatively we can just use the Ctrl+Shift+F10 (Windows) or Ctrl+Shift+R (Mac) shortcut to run the tests.
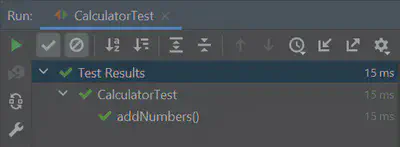
Here we can see the results of running a passing JUnit 5 test in IntelliJ IDEA:

Running with Maven
To run the tests from the command line using Maven:
$ mvn test
We should see output similar to this:
[INFO] -------------------------------------------------------
[INFO]  T E S T S
[INFO] -------------------------------------------------------
[INFO] Running com.arhohuttunen.CalculatorTest
[INFO] Tests run: 1, Failures: 0, Errors: 0, Skipped: 0, Time elapsed: 0.021 s - in com.arhohuttunen.CalculatorTest
[INFO]
[INFO] Results:
[INFO]
[INFO] Tests run: 1, Failures: 0, Errors: 0, Skipped: 0
[INFO]
[INFO] ------------------------------------------------------------------------
[INFO] BUILD SUCCESS
[INFO] ------------------------------------------------------------------------
Running with Gradle
To run the tests from the command line using Gradle:
$ gradle test
We should see output similar to this:
> Task :test
com.arhohuttunen.CalculatorTest > addNumbers() PASSED
BUILD SUCCESSFUL in 0s
Summary
In this JUnit 5 getting started example we have learned how to write and run a simple JUnit 5 test.
The example code for this guide can be found on GitHub.